Day 2
Yesterday I headed up to Rugby again for Day 2 of the certificate. I was looking forward to transferring my design on to the linen and starting to stitch it out. I started by pinning my pricked out design onto the linen and then used a soft roll of wadding to gently push the powder through the holes. Once the design sheet was removed I then carefully painted over all the lines with a very fine brush and watercolour paints. I was now ready to start stitching!
As I needed to start by stitching items that are at the back of the design, I began with one of the leaves near the bottom of the design using 3 different shades of green and a mixture of outline stitch and chain stitch. I will continue with the other similar leaves at home using different combinations of the greens to add variety to the finished design.
During the last 2 weeks I had done a bit of practising of some of the stitches which enabled me to get a feel for the wool and some of the different stitches I might use. Then I moved onto the trellis work on the flower - here I found it quite tricky to lay the threads down evenly in the grid and ended up using a separate piece of wool to work out the position of the next line. The threads are tacked down with a tiny diagonal stitch, then the squares are filled in alternately with satin stitch and french knots using pink and blue threads.
The next section I started work on is the flower petals - outlining them using back stitch. This will then be whipped with a lighter shade of pink. Along with some decisions made about which areas to complete for homework over the next 2 weeks until I go again, that was my days work.
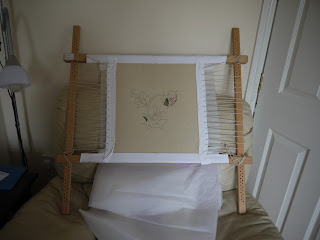
I have now come home to work out the best way I can set up a work area to support the frame without a large outlay of money and it taking up half of the living room. I am going to try using 2 TV tables with a small pad on each to raise the front end up - it may not work which will mean I have to get my thinking cap on again for a different solution. This final photo give some idea of the size of the slate frame I am working on.
Thursday, September 22, 2011
Subscribe to:
Post Comments (Atom)


No comments:
Post a Comment